
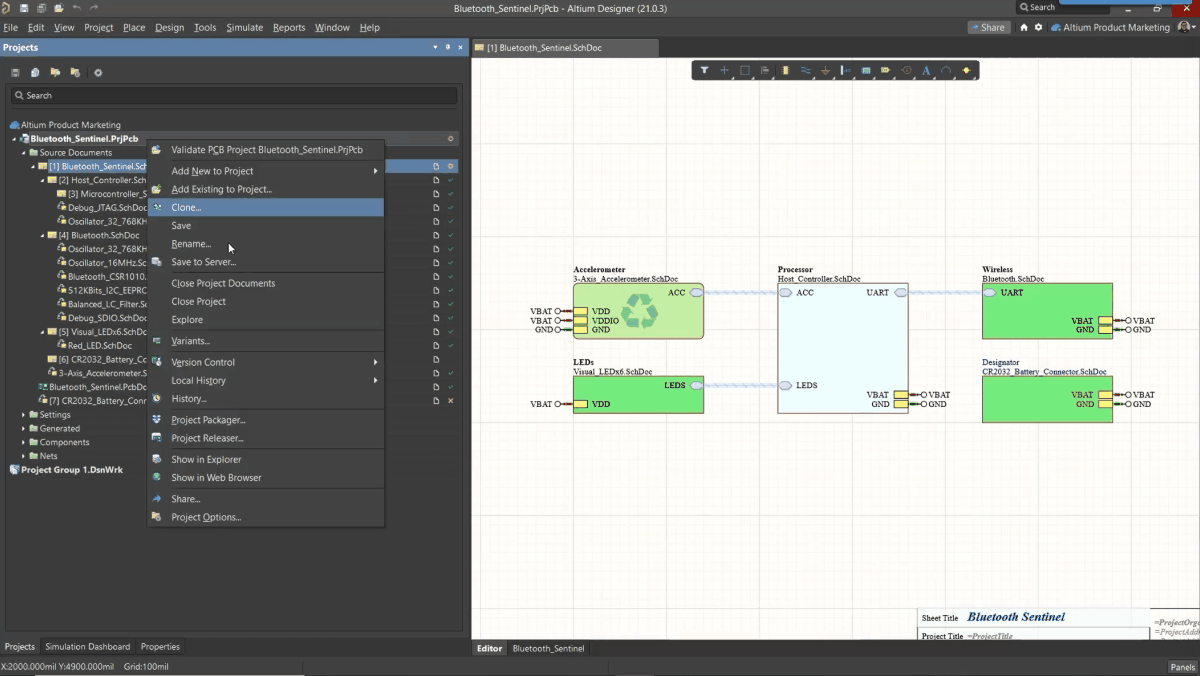
Ever since I started using Github and Google Docs, I fell in love with revision control. Instead of keeping multiple copies of essential files and time-stamping every revision, revision tracking information gets stored alongside the file. This environment works great for code, spreadsheets, and documents, and Altium brings these same features into PCB design.
Altium 365 enables the same capabilities for revision control. You can easily roll back to earlier revisions of a design, clone a current project, and access a previous revision. You can revert to copies of design files within Altium Designer. If you need to revert to an earlier revision of a local file, you can include this previous revision in your Workspace web instance on Altium 365. If you’ve never used revision control for PCB design, here are some guidelines for local and server-managed revision control in your Altium 365 Workspace.
Where Are My Files Stored?
When you open your Workspace web instance on Altium 365, you won’t see your previous revisions of your schematic files. Everything you see in your Workspace web instance is the most recent revision of your design files. So this begs the question, where can I find earlier revisions of design files?
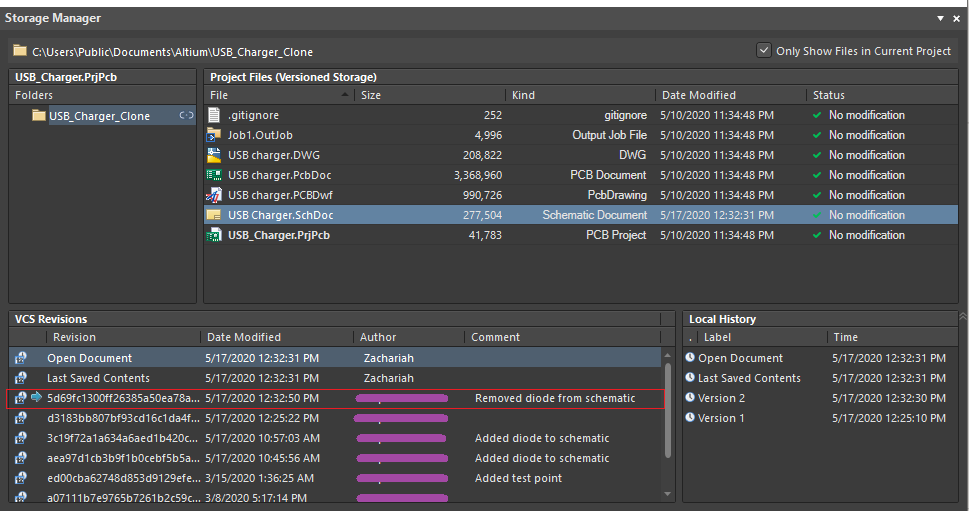
Whenever you make changes to a schematic, PCB document, or another file, a previous revision will be stored on Altium 365. When you open an Altium Designer project, you can access older revisions of your design files stored on your local machine and online. You can access these different revisions in the Storage Manager panel in Altium Designer.
In the image below, I’ve opened one of my Altium 365 projects in Altium Designer. When I open the Storage Manager panel, I can see local and online revisions of my schematic sheets. I’ve outlined the current revision of this particular schematic file in a red box (see below). This revision is currently open in the background window; it is the current revision of the schematic attached to my project.
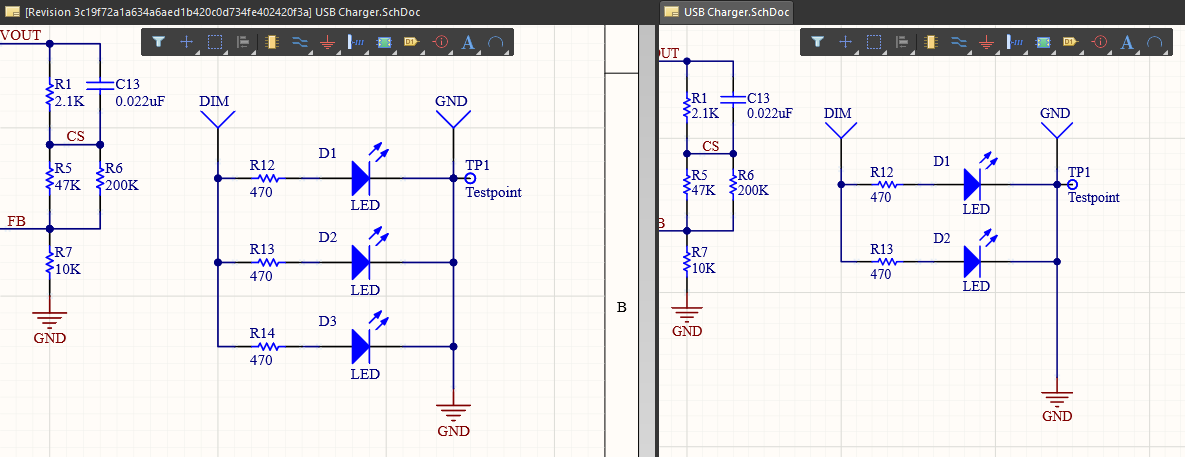
To access one of the revisions, simply double click on the earlier revision, and it will open in the Schematic Editor. You can then tile the windows so that you can compare the two revisions side-by-side, as shown in the image below. The earlier revision of the schematic contains three indicator LEDs in the zoomed-in portion of the schematic in the current revision. The current revision only has two indicator LEDs. As you can see in the Comment section of the Storage Manager panel (see above image), one of the LEDs was removed from the schematic.
Once you open up this earlier revision of your schematic, it will appear in the Projects panel’s Free Documents section. You can right-click on this previous revision in the file and click Explore to locate it on your local machine. You can then move this file to another location on your local device. I like to keep the local copies of my project file in the same place as it helps me stay organized.
Comparing revisions
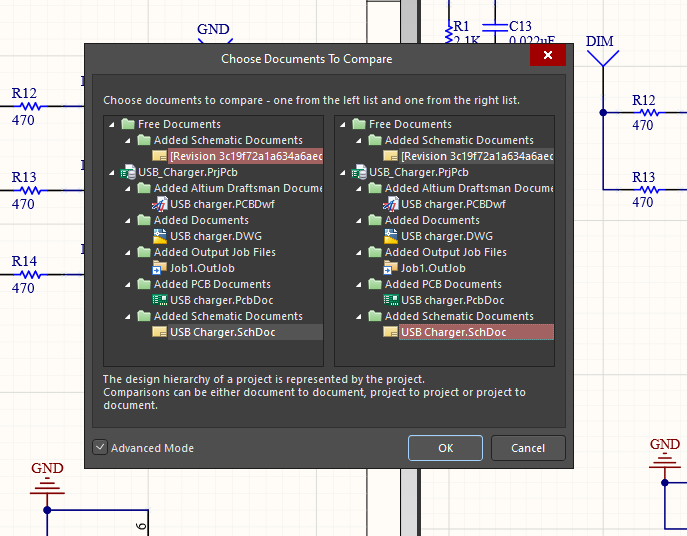
Once you’ve located the earlier revision, you have some options with how to use it. By opening the two schematics side-by-side, I can see exactly where the changes were applied in my schematic file’s newest revision. Note that this allows you to easily see the differences between the current and previous revisions of your schematic. However, there may be other differences that are not obvious; the Compare tool shows a list of differences between the two files.
To access the Compare tool, click on the Projects menu, and click Show Differences. A dialog box will open that allows you to select files to compare. To choose specific files, click on the Advanced Mode option at the bottom of the dialog box. You will see two lists that contain files from the Projects panel. You can now select the files you want to compare. I’ve chosen the earlier revision of my schematic in the left list below, and I’ve chosen the current revision of the schematic on the right list.
After you click OK, you can probe specific differences in each file and inspect these differences visually. The changes will appear as a list of differences, which you can click on to narrow down each file’s specific differences.
Keeping an Earlier revision in Your Current Project
If you’ve decided you want to use the earlier revision of a file in your project, simply rename it and add it to your current project by dragging it into the Projects panel. You can then commit and push your project to your Workspace web instance using the revision control tools in the Projects panel. You can also remove the older revision of the file from your project as you would any other file.
In the image below, I’ve added my previous project revision, and now I’m about to push the project back to my Altium 365 Workspace. After you add the previous revision into the project and remove the unneeded files, simply right-click on the project file and select Commit Whole Project under the revision Control entry. You’ll see the Commit to revision Control dialog appear, and you can select specific files in your project to push to your Altium 365 Workspace.
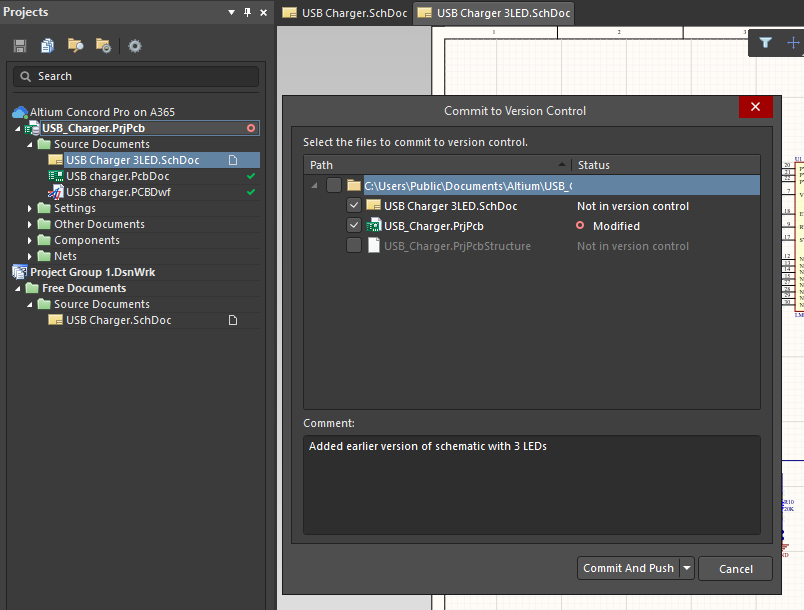
Once I click Commit and Push, the earlier revision of my schematic will be added into revision control. It will now appear in its revision chain. You can implement the same revision control tracking features shown above for PcbDoc files and other files in your project. Note that, in the above window, I’ve removed the additional schematic file from my project, but I could have kept this other file in my project. It would continue to have its own revision chain tracked in my Altium 365 Workspace and accessible in the Storage Manager panel.
Anyone with access to the project will also be able to access these earlier file revisions. Be sure to communicate with your team and keep track of user access within your Altium 365 Workspace. For a more in-depth look at regulating access to different projects in your Altium 365 Workspace, take a look at this tutorial on controlling user access.
Hopefully, this short tutorial helps you access earlier revisions of files stored on your Altium 365 Workspace. This is a simple way to track your files’ previous revisions without manually tracking a long list of files on your local computer. Note that Altium Designer will keep track of your earlier file revisions on your local machine as you edit them. These are also accessible from the Storage Manager panel in the Local History list (see the above window). For more information about revision control on Altium 365, see this tech doc.
Simple Sync Your Way to Success
If you want to use a simpler method of revision control, Altium Designer gives you an option with its Simple Sync feature. This feature stores and synchronizes a PCB design project in Altium 365’s cloud platform. This is great for individual designers, who only need to track their own revisions and won’t need to worry about dealing with revision conflicts. This is also a good wat to deal with private projects as only the project creator will be able to apply edits. To learn more about Simple Sync and how it differs from the Formal Version control feature, read this guide in the Altium Designer documentation.